Monday, July 25, 2016

Wings

Good morning everyone and thank you for dropping by.  I wanted to share with your my PL-sized card entitled Wings.  I used a couple of the new stamp releases available at Lost Coast Designs.


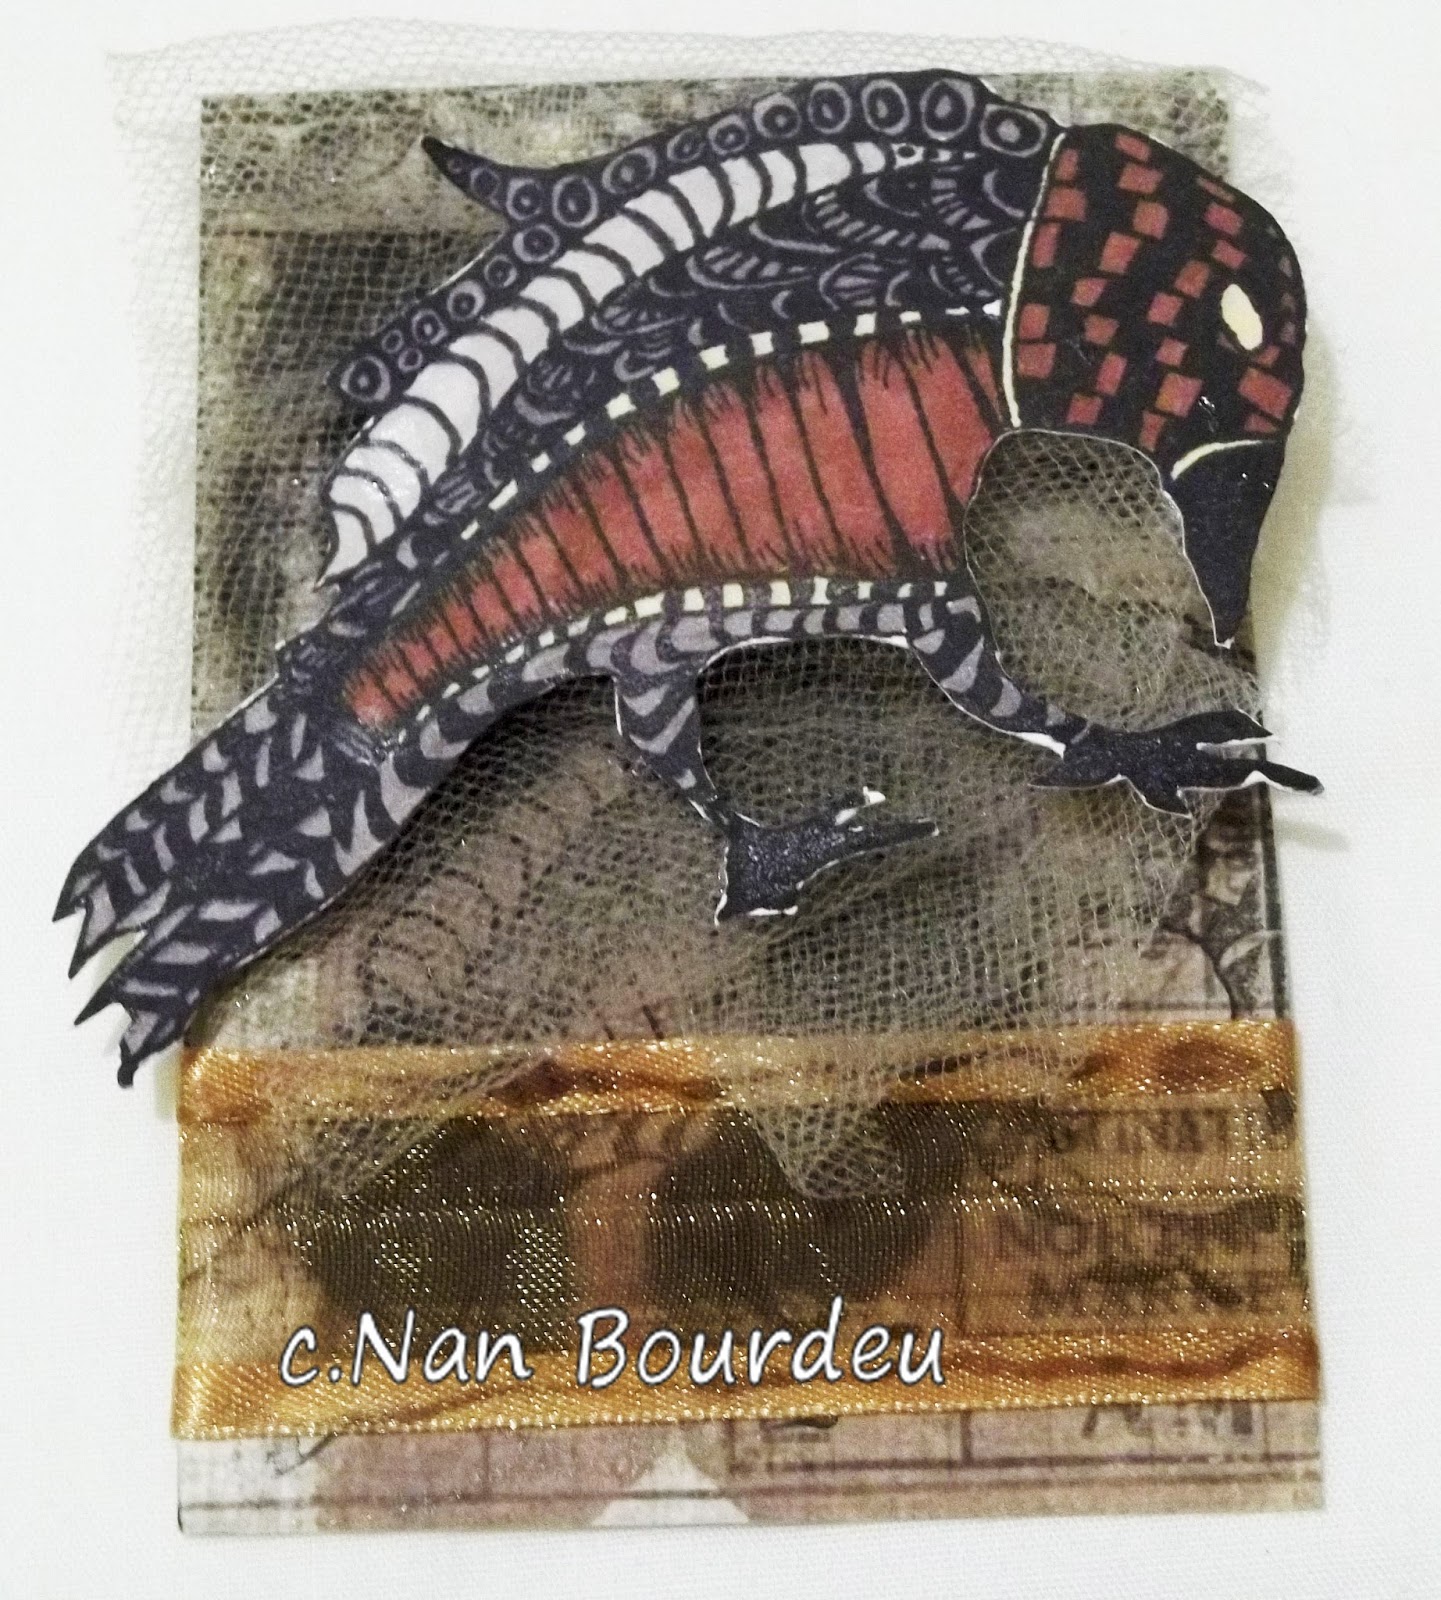
1)  Stamp Indinkera onto a piece of PL-sized (3-3/4 x 5-3/4) white cardboard.
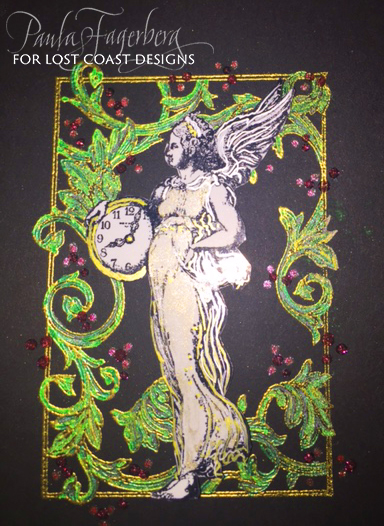
2)  Stamp Winged Girl twice onto mixed media paper with Versafine ink.  Emboss one with LSG Midnight Copper EP and one with Cleopatra's Copper EP.  Cut out.
3)  Sprinkle Nuance powder in orange, bright yellow, and grace green on the background and mist with water.  Dry.
4)  Stencil translucent paste randomly through a circle stencil.
5)  Die cut some shapes using the Sizzix Crosshatch Frameworks die and paint with coral paint.  Spinkle on glitter while the paint is still wet.  Add to background.
6)  Punch out leaves and butterflies.  Spray leaves with LSG Bells of Ireland Green and butterflies with Cotton Candy Pink, A Bit O' Bubbly, and Frenchy's Pink Pouf mists.
7)  Place the Winged Girl you embossed with Midnight Copper EP on top of the other and offset slightly.  Glue together, then add mounting pads at the back to pop it up off the page and add to the card.
8)  Glue down the leaves in a circle around your image.  Add butterflies.
9)  Using soft matte gel, scatter glass glitter, micro beads, and glass beads across the card.  I used rose glass glitter, rust glass beads, and grass microbeads.
10)  Add TH Small Talk words.  Splatter with yellow and white pain and black gesso.

I like using the white cardboard because it's very sturdy.  It held up well to the stamping and all the embellishments and wet media I added.

Hope you enjoyed today's creation.  Until later...................


Marilyn

For The Birds

Good Monday morning everyone!  Hope you July is going great.  I wanted to share with you a tag I created for the current event going on over on the Lost Coast Portal to Creativity.  I've stepped out the process so you can see how it was created.


Start by stamping Bubbles onto a tag with black ink.  Sprinkle Nuance powders in different colors across the tag then mist to activate.  When that dried, I used yellow and orange markers to color in some of the bubbles.  I then dry brushed gesso over the tag to somewhat mute the very bright colors.

Stamp Mini Whimsical Birds 1 & 2 onto some mixed media paper and color with a selection of LSG sprays.  Cut out.  Next cut out some bricks (I used Sizzix's Mixed Media 3 set) and paint with Paper Artsy Cherry Red then emboss with DI Fired Brick EP.  Using a baby wipe, brush a little black paint across the bricks.

Water down some red and black paint and flick across the background.  Do the same with some gesso.  When that is dry, glue down the brick and add shadows with the gray Nuance powder mixed with a little water.  Cut out and paint some alphas and numerals and add to the background.  Add your bricks to the tag then position your birds over the bricks.  Finally, roll a piece of red ribbon in some gray Nuance powder mixed with water and tie off to the top of the tag.

Easy peasy!

Until later.............................
Marilyn

Friday, July 22, 2016

what if.....

Hey there Lost Coasters !  Darlene here to share a small project I did using some very thin birch plywood that I picked up at the craft store.  Made a postcard !!!


I cut the wood the size of a postcard - 4 inches by 6 inches. Then using my fancy scissors I cut the two long sides to give the jagged look.  BTW - very easy to cut......


Inking up my Bird on a Bike stamp (isn't the image FAB)  I stamped it three times without re-inking to give that faded look.   The same colour I used on the bike I sponged the edging.

On the wheels I used some stickle to brighten it up a bit, a gyrl has to have some sparkle !!!  And because this is going to be a postcard it all has to be flat.


So - What if the birds couldn't fly - would they learn to ride a bike....

Lotsa fun making this, that I made a few.  Mailed one off to my daughter hehehehee


Check out our Lost Coast Challenges - maybe you could win some rubber....

Tuesday, July 19, 2016

Whimsical Bird Gift Card Holder - New Stamps Showcase Day 1

Howzit Lost Coasters!
We're showcasing all the latest additions to the Lost Coast Designs stamp catalogue over at Lost Coast Portal to Creativity this week!  
 

Yesterday we featured our new adorable birdies, WHIMSICAL BIRDS by Doris Arndt! 


I was still in "making masculine projects" mode when I created this one and was thinking along the lines of when you need ideas for a group gift from mom, wife and the kids.  So I created this Whimsical Bird gift card holder that makes giving a gift card so much more fun! 


I used Lost Coast Designs large Whimsical Frankie bird for my focal image and to mirror the spots on Frankie I used Carmen's Veranda White Dominoes on the background mat.  The text is from Lost Coast Designs large collection of Misc Words.


The colouring on the Bird die cut panel is a combo of Copics and Derwent pastel pencils and I used 3D Viva Le Pearl Magic Transparent White on the polka dots and the birdie's eye for a touch of fun shimmer and dimension.  I mirrored the shape of the Spellbinders die cut on the gift card cover and on the inside pocket too.

Pop on over to Lost Coast Portal to Creativity to see all the fabulous LCDesigner inspiration!
Thanks for stopping by to see my project today!

Happy Stamping!

 Leigh S-B

THE SHARPIE DOMINO QUEEN

Saturday, July 16, 2016

Come Play ATC's with Us!

Still lots of time to join in the fun at the  Lost Coast Portal to Creativity Challenge,  where the theme is "ATC's" and we know we all love to play with those!  Here is my offering of the Zentangle  Checkered Crow from Lost Coast Designs with some tulle and ribbon to fancy him up on some Holtz's paper.


We look forward to seeing your entries so we can visit your blogs and have a cup of tea and a nice chat!

   Like our Facebook pages
and 
                                                                              here!

                                         AND our brand new Fan Page LIKE us and join us in the fun!

Wednesday, July 13, 2016

My Man - ATC

Last month we had a great event in Lost Coast Portal to Creativity 
to celebrate the fathers day and I made a set of ATC's
Using awesome images from Misc. Anthropomorphs -stamp set.


I colored the images with Inktense pens and had such a fun
time thinking about the words for each 
and how would I decorate each piece.


Making ATC's is so much fun, why not try it and join LCPTC
on going challenge, the theme is "ATC", :D

I hope you are all having a wonderful creative summertime,

Sunday, July 10, 2016

Mystery ATC

Hi Nikki here on the blog today, sharing an ATC I made for this months challenge at the Lost Coast Portal to Creativity. I recently bought Yupo paper and just had to play with alcohol inks on it. I thought the bright vibrant colors and patterns worked really well with this quirky image from Lost Coast Designs. This is one of the Mini flying ladies


I stamped one of the stamps from the ATC borders set onto this scrumptiously rich background and clear embossed it. Then I cut it to size. I stamped the Mini flying lady on to this paper too, and clear embossed and fussy cut her. I added white details and the word is from the awesome set, Misc words. If you haven't checked out Misc words yet, you should.

There is more ATC inspiration at the Lost Coast Portal to Creativity, and there will be a second inspiration post on 15th ....


Thursday, July 7, 2016

Hello Coasties!
Popping in today to share a project made with one of LCD's fine art inspired stamps.  I stamped with Distress inks and made my own background paper.


Materials List:
Stamps: Patricia Collage from Lost Coast Designs
Ink: Peacock Feathers and Bundled Sage Distress ink
Spray inks
Stencil
CS: white, aqua, and dark aqua
Wide Satin Aqua Ribbon
Peacock Blue Tulle
Small Pearls


I just love these fine art inspired stamps.  They are so dramatic and make such a nice project. Of course, I love it paired with my favorite color - aqua.    

See more instructions on my blog, Dreaming and Creating.

Thanks for dropping in today.  I hope you have a super day.
Karen McAlpine

Monday, July 4, 2016

Christmas in July...Sparkly Holiday Card: "Christmas Time"

Hi all! New DT member Paula F here to tell you a bit about my very first official project for Lost Coast Designs! (Though I'm no stranger to working with the company's fantastic images...I was a fan first before coming on board as a design team member...and thrilled to be here, I might add.)

This project is for our fun Christmas in July event (go here to check it out--you can totally win stuff!). Get inspired for the winter holidays and chill out (<--you see what I did there?) by making some wintry, winningly festive art! 


So here's my projjie to hopefully inspire you to get your hands dirty. This card is all shimmer, sparkle, and glitter--though you might just have to trust me on that, because glitz is really hard to photograph. I wanted this card to catch the light in lots of different ways...so I went all out with the metallics and the shine. (As we get to know each other, you will see that I'm not really one for doing things in half measures...)

1) On black cardstock, I stamped the leafy frame from ATC Misc. Set 3 and embossed it with gold powder. (Ooo...shiny!)

2) I then colored it with two shades of metallic green gel pen. There was already some serious light leaping off the page!


3) I took this angel from the Fortune Women set as my focal point and stamped it on white stock with a gloss finish so that the figure would have maximum impact against the busy frame. (And the gloss adds another layer of light refraction, so woo hoo!)

After fussy-cutting the image out, I highlighted the figure with silver and gold metallic pens and gave the angel's garment a glimmering wash of metallic silvery gold. The angel was now blinding white and shimmery as all heck (which is just how you expect angels to be in real life, amirite?).

I mounted the angel to the frame with dimensional foam so it would stand out even just that much more.


4) To make it really Christmassy and festive, I added some berries to the frame with red gel pen and red glitter glue. Thanks to the glitter glue, now I even had dimensional glitter. Very satisfying.


5) Now I needed a sentiment. With a bullet-tipped embossing pen, I calligraphed the words "Christmas Time" (because the angel is holding a clock...get it? Christmas Time?? A HA HA HA) and embossed them with gold embossing powder too. (Ooo...shiny!!)


6) Assembly time! I mounted the whole thing together on some glittery black cardstock, then on some still heavier black cardstock, the edges of which I embossed with black EP. (Ooo...shiny!!!)


Et voila! My first project, full of texture, shimmer, holiday cheer, plus a bad pun, as a design team member for Lost Coast Designs. May there be many more.  :)


Paula F
museofmixedmedia.blogspot.com

Friday, July 1, 2016

JULY NEWS!

Hello Lost Coasters!
Happy Canada Day and 4th of July to all our North American readers!
We've got lots of exciting news and activities happening this month over at Lost Coast Portal to Creativity where we host all our events and monthly challenges, so lets get to it!

First up it's

CHRISTMAS IN JULY TIME! 

 Our Christmas In July event started today!  Join us every day through July 9th for lots of wintery themed projects to cool you down while you cook in the summer sun and for the folks down in the southern hemisphere...here's an extra scarf to help keep you warm while you enjoy the projects the LCDesigners have been creating for you ;0)

Also, starting with our July events we are now using the same prize tier we use for our monthly challenges so the more you play the better the prizes!

JOIN OUR CURRENT CHALLENGE! 
Our next blog Challenge starts on July 4th so stop by and Stay to Play with us :0)

Later this month we will also be showcasing all our newest additions to the Lost Coast Designs stamp catalogue!  There's dozens of new goodies from Whimsical Birds to Tangles!  Stop by if you haven't seen them yet and then become a follower of the Lost Coast Portal to Creativity blog for lots of inspiration!
 

 LCDesigner News!

Next up, I'm delighted to announce that Paula F has joined us as a full time LCDesigner!  You will see her first DT share tomorrow for Day 2 of Christmas in July and then here at the Review on July 4th!  You don't want to miss it!
Stop by our MEET THE DT page and get to know all our fabulous LCDesigners!  Paula's bio will be up shortly!

Last but not least...did you see our massive WINNERS post last week?  If you missed it then feast your eyes on these beauties!

and the WINNERS are.....

ANNE SQUIRE


IONABUNNY


WYVERN


JULIA VAZQUEZ


JULIE STEED

We have one more BIG WINNER to announce too so stay tuned to see which one of our lucky readers walks away with our
BLOGIVERSARY BLOG CANDY

CONGRATULATIONS to all our WINNERS!

 Pop over to the Portal blog for more info on how to claim your prizes!

Before you go I'd like to remind you our wonderful LCD/CV Facebook Fan Group!  Come and hang out with us, share your Lost Coast Designs and Carmen Veranda makes and play in our soon to launch FB Group Challenges and other fun activities too!  Click on the badge and join us, we look forward to seeing you there!
 
https://www.facebook.com/groups/1662303170690736/

Have a fabulous holiday weekend!
Happy Stamping!
Leigh S-B
THE SHARPIE DOMINO QUEEN
LCD/CV DT Leader